💡 A guide to fully understand a key component of IDKit.
A transaction represents the users’ identity verification process. There are 2 ways to create a transaction.
The first method is to create the transaction using our API. You can also create a transaction using our IDKit portal. Here’s a brief explanation of both methods:
1. Create a Transaction via API
Note:
Make sure you have your access token ready. See how to get your token here.
- Send an API request to the Create a Transaction endpoint. Below is the request example to create a transaction using the NORMAL V2 flow.
curl --request POST \
     --url https://penateam.api.au.idkit.com/v1/transactions \
     --header 'accept: application/json' \
     --header 'content-type: application/json' \
     --data '
{
     "name": "MyTest",
     "reference": "Demo",
     "flow_type": "NORMAL2",
     "phone_region_code": "61",
     "phone_number": "00000000",
     "redirect_url_success": "https://google.com/?success",
     "redirect_url_exit": "https://google.com/?exit",
     "notifications": {
          "complete": [
               {
                    "type": "https",
                    "url": "https://example.com/auth",
                    "auth_header_name": "Authorization",
                    "auth_header_value": "Basic dXNlcm5hbWU6cGFzc3dvcmQ="
               }
          ]
     }
}
'
If the request is successful, you will have the transaction ID, the URL, and the expiration timestamp.
{
    "transaction_id": "insert_transaction_id_here",
    "url": "https://testclienta.au.idkit.com/transaction_id",
    "expires_at": "2022-04-27T09:48:10.466Z"
}
Note:
There might be a lot of reasons why your API call isn't working as expected. Visit here for troubleshooting requests.
2. Create a Transaction Using the IDKit Portal
-
Log in to IDKit via our IDKit portal.
-
Select Send Verification.
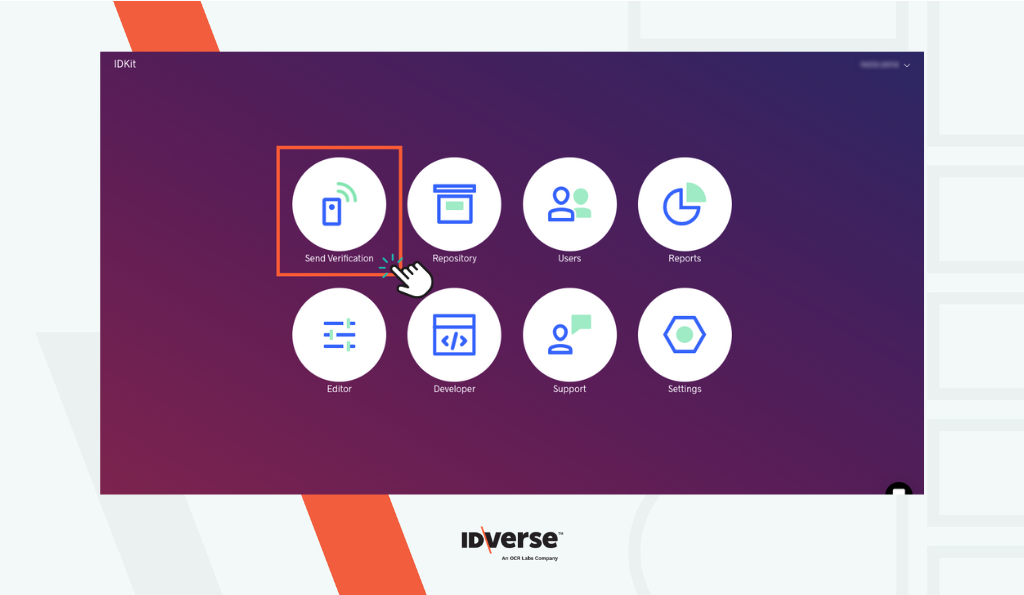
- You will be redirected to the ID Check page to fill in all the available fields.
- Once the required data is filled in, click the Send button.
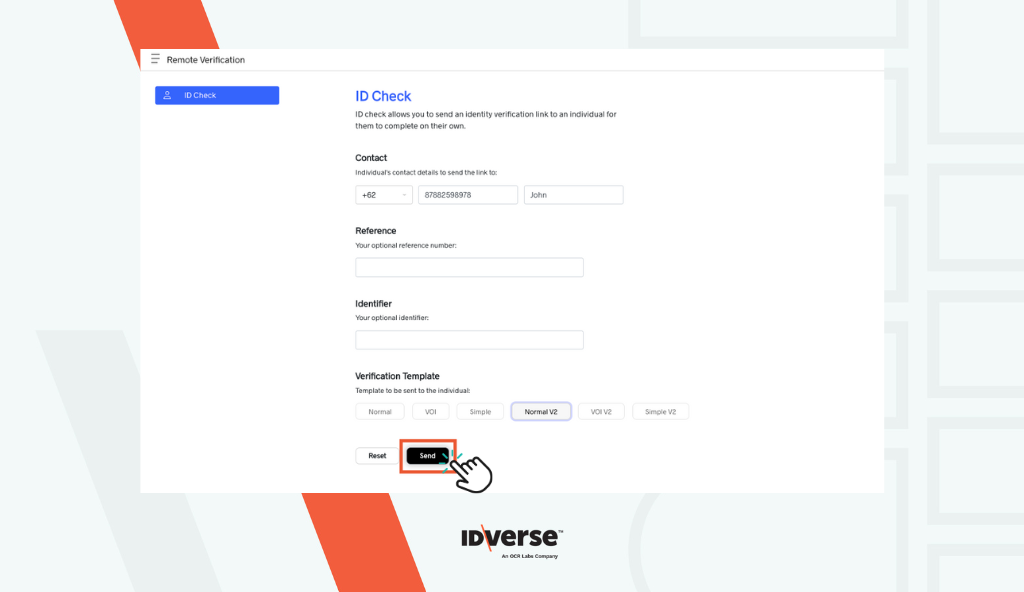
- A text message will be sent to the user containing a link to start the transaction.
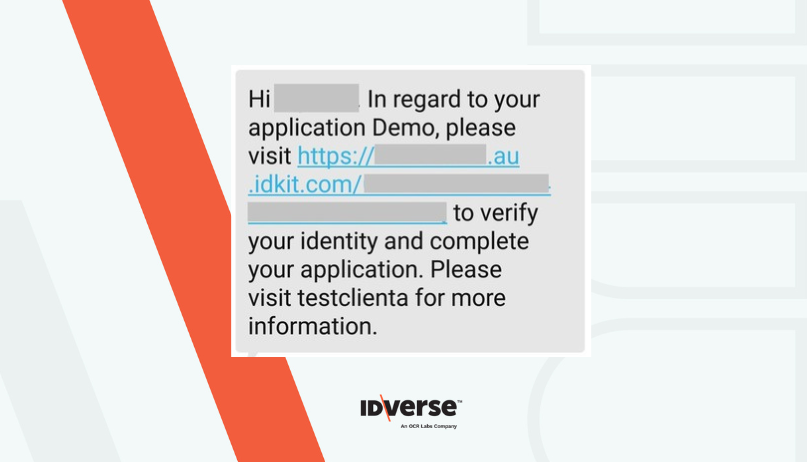
- By clicking the verification link, the user will be redirected to the verification process, which starts from the privacy screen as shown below:
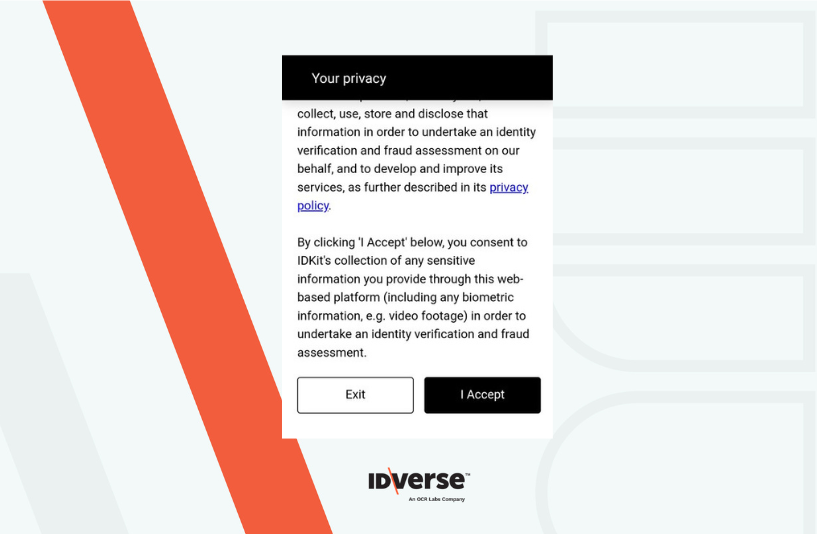
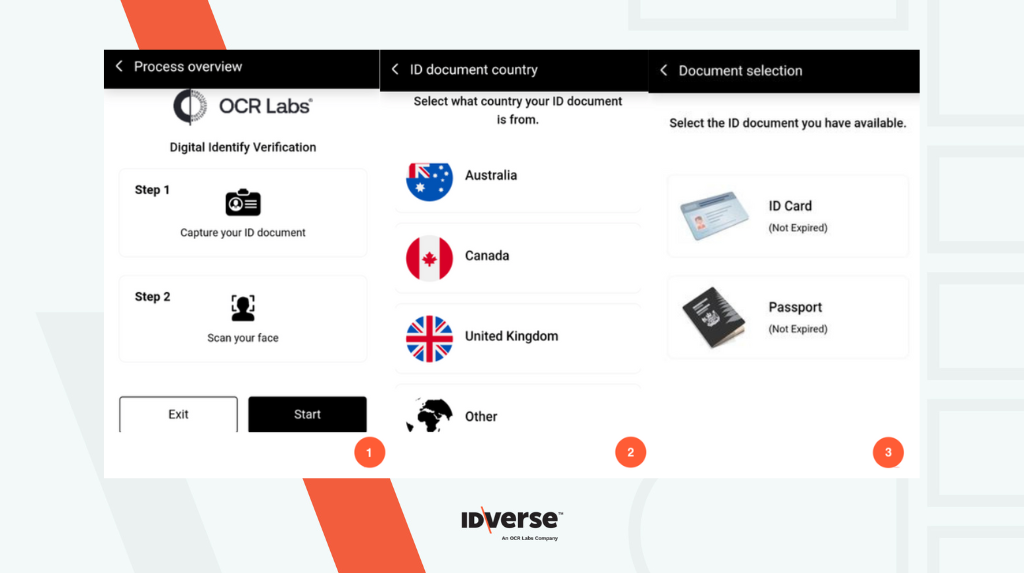
- After the user accepts the privacy consent, they will receive an overview of the verification process > click the Start button.
- The user will select the ID document country and type to start the verification process.
💬 We Are Here to Help!
If you encounter an issue, a bug, or require assistance, please contact our support page here to find the solution. Don't forget to provide any important information on the issue.
